The Best Time to Visit South Africa and Victoria Falls: Optimal Seasons for Your African Adventure

The best time to visit South Africa and Victoria falls

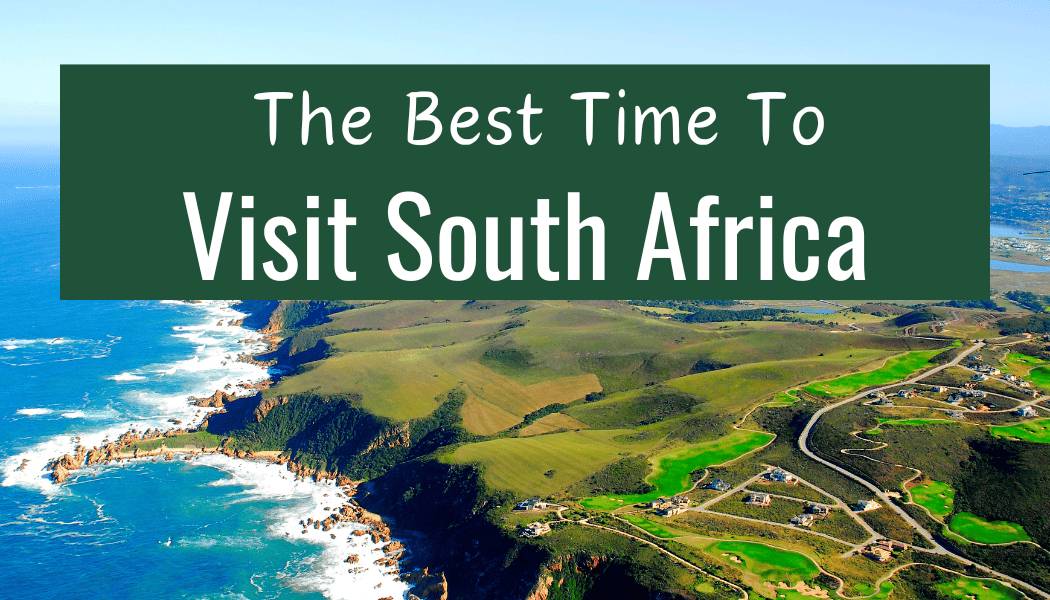
Planning to visit South Africa and Victoria Falls? Timing is everything. The dry season from May to October offers the best experience for your adventure.

You’ll find ideal conditions during these months with clear skies, mild temperatures, and exceptional wildlife viewing opportunities across South Africa’s game reserves.

Animals gather around water sources, making them easier to spot while vegetation thins out.

For Victoria Falls, June to August provides the perfect balance.

The water flow is moderate enough to appreciate the falls’ grandeur while allowing you to enjoy activities like swimming in Devil’s Pool or white-water rafting which become impossible during the high-water months of February to May.

Overview of South Africa and Victoria Falls

South Africa is a diverse country at the southern tip of the African Continent. It features stunning landscapes, vibrant cities, and remarkable wildlife.

The country boasts incredible natural beauty from the Cape Winelands to Kruger National Park.

Victoria Falls or Vic Falls is one of the world’s most spectacular waterfalls, situated on the mighty Zambezi River between Zimbabwe and Zambia in Southern Africa.

This magnificent natural wonder spans nearly 1.7 kilometers wide, making it the largest curtain of falling water on Earth.

The falls are known locally as “Mosi-oa-Tunya,” meaning “The Smoke That Thunders.”

This name comes from the massive spray and thunderous roar which can be seen and heard from miles away.

When visiting Victoria Falls, you can view this natural wonder from either Zimbabwe or the Zambian side of Victoria Falls.

Both countries offer different perspectives and experiences.

Key attractions in South Africa include:

  • Table Mountain in Cape Town
  • Kruger National Park for safari experiences
  • The Garden Route coastal drive
  • Johannesburg’s historical sites

Victoria Falls activities include:

  • Walking tours along viewing paths
  • White water rafting on the Zambezi River
  • Helicopter flights over the falls
  • Bungee jumping from Victoria Falls Bridge

Both destinations offer unique experiences for travelers seeking natural beauty,  wildlife safari, and adventure in Southern Africa.

Climate Patterns in South Africa and Victoria Falls

South Africa and Victoria Falls experience distinct seasonal variations that significantly impact visitor experiences.

Both destinations have clear wet and dry seasons with temperature fluctuations that can determine the best times of the year for your visit.

Understanding South Africa’s Seasons

South Africa’s seasons are opposite to those in the Northern Hemisphere. Summer runs from December to February with average temperatures between 25°C-35°C (77°F-95°F).

This is also the Rainy Season in many regions, especially the eastern and northern parts.

Winter months (June to August) bring cooler temperatures ranging from 5°C-20°C (41°F-68°F).

The Western Cape experiences winter rainfall, while the rest of the country remains fairly dry.

Spring (September-November) and autumn (March-May) offer pleasant moderate temperatures around 15°C-25°C (59°F-77°F). These shoulder seasons often provide ideal weather for sightseeing.

Coastal areas like Cape Town have milder temperatures year-round compared to inland regions such as Johannesburg, where elevation creates cooler conditions.

Deciphering Victoria Falls’ Wet and Dry Seasons

Victoria Falls has two distinct seasons that dramatically alter its appearance. The Rainy Season (late November to March) brings Torrential Downpours that increase water volume, creating a spectacular full waterfall with spray visible from miles away.

During this wet period, the falls reach maximum flow in March and April. The massive spray can drench you within minutes, and visibility of the actual falls may be limited.

The Dry Season (April to October) sees water levels gradually decrease. By September-October, parts of the falls (particularly on the Zambian side) may nearly dry up.

Temperatures vary significantly across seasons. October is the hottest month with highs around 34°C (93°F), while June and July bring cooler temperatures, with nighttime lows sometimes dropping to 10°C (50°F).

This, in my opinion, is the best time of year, not too hot or too wet.

Best Times for Wildlife Viewing

Wildlife viewing varies throughout the year in southern Africa, with each season offering unique animal encounters and photographic opportunities. Timing your visit strategically enhances your chances of spectacular sightings.

Game Viewing in South Africa

The dry winter months (May to September) provide the best game viewing in South Africa’s national parks and reserves.

During this period, the vegetation thins out and animals gather at water sources in the late afternoon, making them easier to spot.

Kruger National Park is particularly excellent in July and August when wildlife concentrates around rivers and waterholes.

Morning game drives offer prime viewing as predators are often active after night hunts.

The cooler winter temperatures also mean fewer insects and more comfortable safari conditions.

The “green season” (November to March) has advantages too.

While animals may be more difficult to find in lush vegetation after the summer rains, you’ll enjoy newborn animals, dramatic landscapes, and fewer tourists.

Bird-watching peaks during these months with numerous migratory species.

Animal Encounters Near Victoria Falls

The prime wildlife viewing season near Victoria Falls runs from June to October.

This dry period forces animals to congregate along the Zambezi River and at permanent water sources.

Hwange National Park, just south of Victoria Falls, reaches its wildlife viewing peak in September and October.

During these months, you’ll find impressive elephant herds at the park’s waterholes.

The dry conditions make tracking animals easier as they follow predictable patterns.

River safaris along the Zambezi offer excellent hippo and crocodile viewing year-round.

However, water levels affect boat access, with August to October providing the best balance between water levels and wildlife concentration.

Bird enthusiasts should consider the November to April period when migratory birds enhance the already diverse avian population.

You may like

The best wildlife photography camera

Optimal Seasons for Visiting Victoria Falls

Victoria Falls offers dramatically different experiences throughout the year based on water flow.

Your visit timing will determine whether you witness powerful water volumes or have clearer views of the geological formations.

High Water Season

The high water season at Victoria Falls runs from February to July, peaking in April and May. During this period, the Zambezi River swells with rainwater from Angola and Zambia’s wet seasons.

Water volume reaches up to 500 million liters per minute flowing over the falls.

The spray can rise 400 meters into the air and be visible from up to 50 kilometers away!

This is the most impressive time to witness the raw power of what locals call “Mosi-oa-Tunya” or “The Smoke That Thunders.” The noise is deafening and you’ll get soaked on the viewing paths.

Key High Season Benefits:

  • The most dramatic and powerful water display
  • Ideal for photography of the full curtain of water
  • Perfect for rainbow spotting in the massive spray clouds

Remember to bring waterproof protection for yourself and any electronics.

Low Water Season

From August to January, Victoria Falls experiences significantly reduced water flow, with November typically being the lowest point.

Water volume can drop to just 10 million liters per minute.

During this “dry” season, the eastern sections (the Zambian side) may completely dry up, revealing the rocky facade of the falls.

The main western channels (Zimbabwe side) continue flowing year-round.

The reduced spray offers superior visibility of the actual cliff face and geological features.

You can see deeper into the gorge and appreciate the falls’ structure more clearly.

Key Low Season Benefits:

  • Better visibility of the falls’ geological formations
  • Opportunity to swim in the Devil’s Pool (Zambian side)
  • Easier photography without constant water spray
  • More favorable conditions for activities like white-water rafting

The low water season also allows access to Livingstone Island and unique viewing perspectives impossible during high flow periods.

Adventure Activities and Their Best Seasons

Both South Africa and Victoria Falls offer thrilling adventures that change with the seasons.

Timing your visit right ensures you’ll experience these activities at their best, with optimal conditions for safety and enjoyment.

Adrenaline Rush at Victoria Falls

The mighty Victoria Falls provides different adventure opportunities throughout the year.

For white-water rafting, visit during low water season (August to December) when rapids reach their most challenging Class V rating.

The famous Devil’s Pool, where you can swim at the edge of the falls, is only accessible during the dry season (September to December) when water levels are lower.

Bungee jumping from the Victoria Falls Bridge is available year-round, but offers clearer views during dry months.

The Flight of Angels helicopter tours provide spectacular aerial views regardless of season, though visibility is better during dry periods.

If you’re seeking the most dramatic views of the falls, visit between February and May when water volume is highest, creating the most impressive spray.

Outdoor Pursuits in South Africa

South Africa’s diverse landscape offers adventures for every season.

Safari experiences peak during dry winter months (May to September) when animals gather at water sources and vegetation is thinner, making wildlife easier to spot.

For whale watching along the coast, plan your visit between June and November when southern right whales migrate to South African waters.

The peak occurs in September and October.

Mountain hiking is best during autumn (March to May) and spring (September to November) when temperatures are moderate.

The Drakensberg mountains are particularly beautiful during these periods.

Shark cage diving is available year-round in Gansbaai and Mossel Bay, with peak great white shark activity between April and October.

Surfing conditions are excellent year-round, with Jeffrey’s Bay offering world-class waves peaking in winter (June to August).

Travel Tips for Health and Comfort

Preparing for your South African adventure requires attention to health precautions and weather considerations.

These practical tips will help you stay comfortable throughout your journey.

Dealing with Mosquitoes

Mosquitoes can be a nuisance in South Africa, particularly in summer months and near water sources like Victoria Falls.

Pack insect repellent containing DEET (at least 30%) for effective protection.

Essential mosquito protection items:

  • Long-sleeved shirts and pants (especially for evenings)
  • Bed nets if staying in budget accommodations
  • Plug-in repellents for your room

Consider taking antimalarial medication if traveling to higher-risk areas like Kruger National Park or during rainy seasons.

Consult your doctor at least 4-6 weeks before departure to discuss appropriate options.

Apply repellent during dawn and dusk hours when mosquitoes are most active. Covering exposed skin reduces your bite risk significantly.

Navigating Seasonal Weather Conditions

South Africa experiences distinct seasons that affect your comfort while traveling. Pack layers regardless of when you visit, as temperatures can fluctuate throughout the day.

What to pack by season:

Season Daytime Evening Must-Have Items
Summer Hot Warm Sun hat, sunscreen, light clothing
Winter Mild/cool Cold Warm jacket, scarf, gloves

During the dry season (May-October), bring moisturizer and lip balm as the air becomes quite dry. Hydration is crucial year-round, but especially important during summer months.

If visiting Victoria Falls, bring a waterproof jacket and protective case for electronics during the high water season (February-June) when the spray is intense.

Cultural and Scenic Highlights

South Africa and the Victoria Falls region offer remarkable experiences that blend cultural heritage with breathtaking natural beauty.

These destinations feature historically significant landmarks and some of the world’s most impressive natural formations.

Historical Sites in South Africa

Robben Island stands as a powerful symbol of South Africa’s struggle for freedom.

This UNESCO World Heritage Site housed Nelson Mandela for 18 of his 27 years in prison.

You can take a ferry from Cape Town and tour the facility with former political prisoners as guides.

The Apartheid Museum in Johannesburg provides a moving and comprehensive look at South Africa’s difficult past.

Through photographs, artifacts, and interactive exhibits, you’ll gain a deeper understanding of the country’s journey to democracy.

In Cape Town, the colorful Bo-Kaap neighborhood showcases distinctive architecture with brightly painted houses.

This area reflects the rich Cape Malay culture, with cobblestone streets and the oldest mosque in South Africa.

The Cradle of Humankind near Johannesburg contains fossil sites that have yielded some of the world’s oldest human ancestor remains.

You can explore caves like Sterkfontein where significant paleontological discoveries continue today.

Natural Wonders Around Victoria Falls

The mighty Victoria Falls straddles the border between Zimbabwe and Zambia, creating one of Earth’s most spectacular waterfalls.

Known locally as “Mosi-oa-Tunya” or “The Smoke That Thunders,” the falls create a mist visible from miles away during high-water season.

Knife-edge Bridge in Zambia offers heart-stopping views as you walk through the spray.

For the adventurous, Devil’s Pool (accessible from the Zambian side) allows swimming at the very edge of the falls during dry season.

The Zambezi River provides opportunities for wildlife viewing on boat safaris. You’ll spot hippos, crocodiles, and elephants coming to drink along the banks.

Batoka Gorge below the falls features dramatic zigzag patterns carved by the powerful river.

You can appreciate this geological wonder through activities like helicopter flights or whitewater rafting when water levels permit.

Accommodations and Best Times to Book

Finding the right place to stay and booking at optimal times can save you money while enhancing your South African and Victoria Falls experience. Both regions offer diverse accommodation options across different price points.

Staying in South Africa

South Africa provides a wide range of lodging choices from luxury hotels to budget-friendly hostels.

In Cape Town, waterfront hotels offer stunning views but book up quickly during the December-February high season. Booking 6-8 months ahead for this period is essential.

Safari lodges in Kruger National Park vary from $100 per night to $1000+ for luxury options.

The best deals appear during May-June (shoulder season) when you’ll find 15-30% discounts while still enjoying good wildlife viewing.

For budget travelers, guesthouses and B&Bs in cities like Johannesburg offer excellent value at $40-80 per night. Book these 2-3 months in advance.

Airbnb has grown popular across South Africa, with private rooms starting at $25 and entire homes from $60 per night.

Victoria Falls Lodging Options

The Victoria Falls area features accommodations on both the Zambian and Zimbabwean sides.

The Zimbabwean side offers more lodging options, from the historic Victoria Falls Hotel to budget-friendly backpacker hostels.

Luxury lodges along the Zambezi River provide spectacular views and all-inclusive packages ranging from $350-800 per night.

These book up 4-6 months in advance, especially during the April-August high season when the falls are at their most impressive.

Mid-range hotels in Victoria Falls Town typically cost $100-200 per night and offer good amenities. For the best rates, book these 3 months ahead.

During low season (November-March), you can find significant discounts of up to 40%, though some activities may be limited due to water levels.

Travel Itineraries for Seasonal Visits

Planning your visit to South Africa and Victoria Falls requires careful timing to match your travel goals with the optimal seasons.

The right itinerary can maximize wildlife viewing, comfortable weather, and unique seasonal experiences.

South Africa Trip Planning

Summer (November-February)

  • Focus on coastal areas like Cape Town and the Garden Route
  • Pack light clothing but bring layers for evening temperature drops
  • Allow 10-14 days for a comprehensive experience

The summer months are perfect for beach activities and wine tasting in the Cape Winelands.

You’ll find Kruger National Park lush and green, though wildlife viewing can be challenging due to thick vegetation.

Consider visiting Cape Town first, then heading east along the coast.

Winter (June-August)

  • Prioritize safari experiences in Kruger and other reserves
  • Pack warm clothing for mornings and evenings
  • Plan 7-10 days minimum for wildlife viewing

Winter offers exceptional game viewing as vegetation thins and animals gather at water sources.

The Western Cape receives rainfall during this period, so northern regions provide better safari conditions.

Exploring Victoria Falls Region

High-Water Season (February-June)

  • Book accommodations 3-4 months in advance
  • Allow 3-4 days in the area
  • Consider helicopter tours for dramatic aerial views

During these months, the falls reach peak flow creating spectacular thundering cascades. T

he spray can be intense, sometimes obscuring views, but creating magnificent rainbows.

Bring waterproof gear if you plan to cross Knife-Edge Bridge or take the Rainforest Walk.

Low-Water Season (August-January)

  • Plan adventure activities like white-water rafting and swimming in Devil’s Pool
  • Include day trips to nearby national parks
  • Stay 4-5 days to experience both the falls and activities

This period offers clear views of the rock face and gorges. You can venture closer to the edge on the Zimbabwe side and even swim in natural pools near the edge of the falls when water levels permit.

Birdwatching Seasonal Guide

South Africa and Victoria Falls offer amazing birdwatching opportunities throughout the year.

The best time for your birdwatching adventure depends on what birds you want to see.

Summer (November to March) is when migrant birds arrive from Europe and Asia.

This rainy season brings lush greenery, making it perfect for spotting colorful species. Over 200 migrant species join the resident birds during this time.

You’ll find the greatest variety of birds during summer months. Look for the African Paradise Flycatcher and European Bee-eaters among the seasonal visitors.

Winter (May to August) offers clearer visibility with less foliage. Birds are easier to spot as they gather around limited water sources.

While you’ll see fewer species overall, the viewing conditions are often better.

The area around Victoria Falls supports over 400 bird species year-round. Early mornings provide the best birdwatching opportunities regardless of season.

Season Bird Activity Conditions Special Features
Summer Highest diversity, migrants present Lush vegetation, some rain Breeding plumage, nesting behaviors
Winter Fewer species, concentrated at water Clear skies, better visibility Easier spotting, less crowded

For serious birdwatchers, plan your trip during the transition months (April or October) to potentially see both resident birds and some migrants.

Remember to bring binoculars, and a field guide, and wear neutral-colored clothing for your birdwatching excursions.

Other places worth mentioning

Now Africa is not close enough for most of us that we can always fly there, for most, it`s a once-in-a-lifetime experience.

How about visiting most of Southern Africa? There are places like the Chobe River, Chobe National Park, the Zambezi National Park, and the Okavango Delta.

Anyway, that`s not here or now, this post is about the best time to visit South Africa and Victoria Falls but I thought I’d mention these in case you are making travel plans.

You may like

The best time for Safari in Kenya

12 of the best beaches in Mombasa Kenya

Frequently Asked Questions

Planning a trip to South Africa and Victoria Falls requires understanding seasonal variations and their impact on your experience.

These common questions address timing, conditions, and what to expect during different times of the year.

When is the peak tourist season for South Africa and Victoria Falls?

The peak tourist season for South Africa runs from November to March, during the southern hemisphere summer.

These months bring warm temperatures and clear skies, making them popular for safaris and beach activities.

For Victoria Falls, peak season occurs from June to August. During these winter months, water levels are moderate, providing excellent visibility of the falls without excessive spray.

Tourist numbers increase during these periods, so expect higher prices and more crowded attractions.

Booking accommodations and activities well in advance is highly recommended.

What are the advantages of visiting Victoria Falls during the dry season?

The dry season (August to December) offers superior visibility of the actual rock face and gorges of Victoria Falls. Water levels are lower, allowing you to see the geological formations more clearly.

You can participate in activities like swimming in Devil’s Pool, which is only accessible when water levels are lower.

This natural infinity pool at the edge of the falls is a unique experience.

Photography opportunities improve during this time as there’s less spray to interfere with your shots. Walking paths are also drier and easier to navigate.

How does the experience of Victoria Falls differ between the rainy and dry seasons?

During the rainy season (November to April), Victoria Falls transforms into a thundering spectacle with massive water volume.

The spray can rise up to 400 meters and is visible from miles away, earning its local name “Mosi-oa-Tunya” (The Smoke That Thunders).

In contrast, the dry season (May to October) offers clearer views of the rock face and gorges.

Water flow decreases significantly, especially by October and November when parts of the falls (particularly on the Zambian side) may dry up completely.

The rainy season provides more dramatic photographs of powerful water flow, while the dry season allows for better close-up exploration and activities like rafting and swimming near the falls.

Which months offer the best water flow for viewing Victoria Falls?

March to May provides optimal water flow for viewing the falls at their most impressive.

These months follow the rainy season, when the Zambezi River reaches peak volume.

During April, you’ll witness the falls at maximum flow, creating a spectacular misty curtain across the entire 1.7 km width. Be prepared to get wet from the intense spray!

June and July offer a good balance between water volume and visibility. The falls remain impressive while spray levels decrease enough to improve viewing conditions.

How can one determine the ideal duration for a trip to South Africa and Victoria Falls?

For a comprehensive experience of both destinations, allocate at least 10-14 days. This allows time for South Africa’s diverse attractions and a proper Victoria Falls visit.

Victoria Falls itself requires 2-3 days to fully appreciate. This gives you time to view the falls from different angles and participate in activities like helicopter tours, river cruises, or adventure sports.

South Africa’s main regions (Cape Town, Kruger, Garden Route) each deserve 3-4 days minimum.

Consider your interests—wildlife, wine, culture, or beaches—when allocating time to different areas.

Are there specific months to avoid visiting Victoria Falls due to weather conditions?

October and November can be challenging months due to extreme heat and lower water levels. Daytime temperatures often exceed 35°C (95°F), making outdoor activities uncomfortable.

The heaviest rainy season (January-February) brings such intense spray that visibility of the falls is significantly reduced.

Walking paths become slippery, and some activities like white water rafting may be suspended due to dangerously high water levels.

Late September through early November might disappoint visitors expecting the classic thundering falls, as water flow can be minimal, especially on the Zambian side.

Both South Africa and Zimbabwe in my opinion are a year-round destination, you just have to choose if you prefer warmer temperatures, the start of Spring because anyway, Southern Africa has mild winters.

I’d recommend avoiding school holidays as this is peak safari season for locals, as there are discounts encouraging local South Africans to visit and have a safari experience.

Can You Bring an Epipen on a Plane? TSA Guidelines for Air Travel with Medication

woman injecting an Epipen

Traveling with lifesaving medications or severe allergies can be stressful, especially for an airline passenger.

I`m sure you`ve already heard some food allergy stories and you may wonder about an emergency care plan should you be affected.

Many travelers wonder about the rules for bringing medication like medical kits, insulin pumps, or EpiPens on planes in case of a medical emergency.

Yes, you can bring an EpiPen on a plane, and airlines allow them in both carry-on and checked luggage.

However, medical experts strongly recommend keeping your EpiPen in your carry-on baggage where you can access it quickly during an allergic emergency.

When flying with an EpiPen, it’s helpful to keep it in its original packaging with the prescription label. While not always required, having a note from your doctor can make the security screening process smoother.

This is particularly important for international travel where regulations may differ slightly from the United States.


An Epipen sitting on a tray next to a boarding pass and passport, with an airplane window in the background

Understanding Epipens and Air Travel

Traveling with emergency medications requires knowing specific regulations to ensure your safety during flights. Epipens are critical medical devices for those with severe allergies, and airlines have clear policies about carrying them onboard.

What Is an Epipen?

An epinephrine auto-injector, also known as an EpiPen is a device containing epinephrine (adrenaline) used to treat severe allergic reactions called anaphylaxis. These life-saving devices are prescribed to people with serious allergies to foods, insect stings, medications, or other triggers.

When you experience a severe allergic reaction, your Epipen delivers a measured dose of epinephrine through a spring-loaded needle. The medication works quickly to reverse dangerous symptoms like throat swelling, difficulty breathing, and dropping blood pressure.

Epipens contain needles and are classified as medical syringes, but they fall under special exemptions in air travel regulations. Unlike regular syringes, you don’t need specific documentation to carry them.

Standard Epipens have a yellow label and deliver 0.3mg of epinephrine. EpiPen Jr. devices (with green labels) contain 0.15mg for children weighing between 33-66 pounds. So if used correctly,you get a proper dose of epinephrine needed.

You should always carry your Epipen in its original packaging with the prescription label visible when traveling.

Regulations and Guidelines for Medications in Air Travel

Traveling with medications requires knowledge of specific rules to ensure a smooth journey through airport security.

Different types of medications have different requirements, especially those that are life-saving or require special handling.

Airport Security Procedures

When bringing medications through airport security, keep them separate from other belongings.

Place all medications in a clear plastic bag for easy inspection. ou don’t need to follow the 3-1-1 liquid rule for liquid medicine, but tell the security officer about them before screening begins.

TSA officers may need to test liquid medications for explosives. This screening won’t harm your medications.

If you prefer your medication not to go through the X-ray machine, request a visual inspection instead.

Always bring documentation for your medications. This includes the pharmacy label your resident physician or doctor’s note, especially for controlled substances or unusual medications.

Prescription Medication Policies

You can bring prescription medications in pill or solid form in unlimited amounts through security checkpoints. However, the medication should be in its original labeled container when possible.

Different countries have varying laws about importing prescription drugs. Research your destination’s regulations before traveling internationally. Some nations restrict certain medications that are legal in your home country.

Keep medications in your carry-on bag rather than checked luggage.

This prevents loss and exposure to temperature changes that might affect potency. It also ensures access to your medication during flight delays.

Medication names should match your ID if possible. This helps avoid questions at security or customs.

Needles and Syringes Protocols

You may bring needles and syringes through security when necessary for medical conditions. This includes EpiPens, insulin pens, and other injectable medications. Inform the security officer before screening begins.

Medical devices like syringes should be accompanied by the medication they’re used with. This helps verify their medical purpose.

Having a doctor’s note explaining the need for these items can be helpful but isn’t required by TSA.

Used sharps should be stored in proper disposal containers during travel. Many airports have sharps disposal units in restrooms. For longer trips, bring a travel sharps container.

When traveling internationally, check if your destination allows medical needles and syringes. Some countries have specific declaration requirements for these items at customs.

You may like this Compact Travel Sharps Disposal Container that you can also use at home.

Packing Your Epipen for Flight

Bringing your EpiPen when you travel by air requires proper planning and understanding of commercial airlines regulations. Commercial flights may have critical difference in their rules as to what they consider dangerous goods in the small print.

Correct storage and placement ensure you’ll have access to this life-saving medication when needed.

You may like

Can I bring CBD flowers on a plane

Carry-On Versus Checked Luggage

Always pack your EpiPen in your carry-on bag, never in checked luggage. Airlines and the TSA strongly recommend keeping all medications with you during flight.

Temperature fluctuations and pressure changes in the cargo hold can damage your EpiPen or lead to device failures.

When passing through security, inform TSA agents that you’re carrying an epinephrine auto-injector.

You don’t need to place your EpiPen in the clear liquid bag that’s required for other liquids.

It’s best to keep your medication in its original packaging with the prescription label visible.

Though not always required, carrying a copy of your prescription or a letter from your doctor can be helpful if questions arise during security check-in.

Proper Storage and Accessibility

Store your EpiPen at room temperature (68-77°F) during your flight. Avoid exposing it to extreme heat or cold, which can reduce its effectiveness.

Keep your EpiPen easily accessible in your carry-on bag—ideally in an outer pocket or near the top where you can reach it quickly.

Consider using a medical alert bracelet to inform others of your allergy in case of an emergency.

Pack at least two auto-injectors when traveling. Severe reactions might require a second dose before you can get medical help.

Check the expiration date before your trip and inspect the solution through the viewing window.

The medication should be clear and colorless. If it’s cloudy, discolored, or contains particles, you’ll need a replacement before flying.

Traveling with Epipens: Security and Usage

Traveling with your epinephrine auto-injector requires understanding airport security procedures and knowing how to use it properly during a flight if needed.

Security Checkpoint Expectations

When going through airport security with Epinens, you should always inform TSA agents that you’re carrying these medical devices.

Epipens are allowed in both carry-on and checked luggage, but it’s strongly recommended to keep them with you at all times.

Always bring your prescription or a doctor’s note. This isn’t technically required, but it can help prevent confusion or delays.

Your epinephrine injectors will go through the X-ray machine with your other carry-on items. If you’re concerned about X-ray exposure, you can request a visual inspection instead.

TSA agents may ask you to remove the Epipens and other liquid medication from your bag for closer inspection. This is routine and shouldn’t cause alarm.

Using Your Epipen on the Plane

If you experience a severe allergic reaction during your flight, don’t hesitate to use your epipen. Remove it from its case and follow the instructions for proper administration.

Alert the flight attendants immediately before or after using your epipen. They’re trained to handle medical emergencies and can provide additional assistance.

The cabin crew may make an announcement asking if there’s a doctor on board who can help.

Most airlines carry basic emergency medical equipment, but your personal epipen is your most reliable resource.(maybe you`ve read Lindsey Ulin’s story)if not, you can read it here from the Boston Globe to understand that not even U.S Airlines do not always carry adequate medical kits for specific requirements.

After using your Epipen, you’ll still need emergency medical care. The flight crew can help arrange for medical services to meet the plane upon landing if necessary.

Practical Tips for a Safe Journey

Traveling with an EpiPen requires some advance planning and clear communication to ensure you have access to this life-saving medication throughout your journey.

Pre-Flight Preparation

Always keep your EpiPen in your carry-on luggage, never in checked baggage. The cargo hold’s temperature fluctuations could damage the medication.

Bring your original prescription or a letter from your doctor that explains your allergy and need for the EpiPen.

This documentation should clearly state your name, the prescribing doctor’s information, and details about your medical condition.

Pack at least two auto-injectors in case one malfunctions or you need a second dose. Store them in their original packaging with prescription labels intact.

Consider wearing a medical ID bracelet that identifies your allergy. This can be helpful if you experience a reaction and cannot communicate.

Check your EpiPen’s expiration date before traveling. Airport pharmacies often charge premium prices if you need a last-minute replacement.

Communicating with Airline Staff

Inform the airline about your severe allergy when booking your flight. Many airlines have protocols for passengers with medical needs.

During the security check, tell TSA agents that you’re carrying an EpiPen for personal medical use before your bags go through the scanner.

While EpiPens are allowed, proactive communication prevents delays.

Request to board early if you have food allergies. This gives you time to wipe down your seating area to remove potential allergens.

Consider alerting flight attendants about your condition once aboard. They can help ensure (safe food ) food not containing your allergens isn’t served nearby and can assist in an emergency.

If you’re uncomfortable speaking about your condition publicly, write a note to share with flight staff discreetly.

Frequently Asked Questions

Traveling with an EpiPen involves specific airline regulations and security procedures that vary by location and carrier.

Here are answers to common questions about flying with this important medication.

Are there specific airline policies for carrying an EpiPen on domestic flights?

Most U.S. airlines follow TSA guidelines for EpiPens, allowing them in carry-on bags when properly labeled.

Airlines like American, Delta, and United permit EpiPens without counting them toward your liquid allowance.

Some carriers may ask you to inform them during check-in that you’re carrying an EpiPen. This helps flight crew know medical devices are on board in case of emergency.

Are you allowed to bring an EpiPen in your carry-on luggage when flying internationally?

Same with portable oxygen concentrators, you can bring EpiPens in carry-on luggage for international flights.

International regulations generally align with allowing necessary medical items for people with special requirements.

Some countries may have varying requirements, so check with your destination’s embassy website before traveling.

Some nations require advance notification or documentation for prescription medications.

If you are unsure of the country you are flying to, you should find answers on their gov website.

The International Air Transport Association (IATA) recognizes EpiPens as essential medical devices permitted in cabin luggage.

Do you need to provide a medical certificate or doctor’s note to travel with an EpiPen?

While TSA doesn’t require documentation for EpiPens, carrying a doctor’s note or prescription label is strongly recommended.

This documentation can prevent misunderstandings at security checkpoints.

Remember the final decision rests on the screening officer, make the security process as easy as possible by having reasonable quantities for personal use.

For international travel, some countries may require proof that the medication belongs to you.

Your documentation should include your name, doctor’s information, and medication details.

Having this paperwork is especially important when traveling to countries where English isn’t widely spoken.

How should an EpiPen be stored while traveling on an airplane?

Keep your EpiPen in its original packaging at room temperature (68-77°F). Avoid storing it in checked luggage where temperature fluctuations occur.

Airplane cabins are temperature-controlled, making them suitable environments for EpiPens. Keep the device easily accessible in your carry-on bag or personal item.

Don’t leave your EpiPen in direct sunlight or extreme temperatures, as this can reduce its effectiveness.

Can injection pens, like EpiPens, be passed through X-ray machines at airport security?

Yes, EpiPens can safely pass through airport X-ray machines without damage. The scanning process won’t affect the medication’s potency or the injector mechanism.

If you’re concerned, you can request a visual inspection instead. Inform the security officer that you’re carrying an epinephrine auto-injector before screening begins.

Always keep your EpiPen in your carry-on rather than checked luggage to maintain proper temperature and accessibility.

What are the procedures for declaring a medical device such as an EpiPen at airport security?

When approaching security, inform the TSA officer that you have an EpiPen before placing your items on the conveyor belt. This gives them advance notice of the medical device.

Keep your EpiPen in its original labeled packaging or prescription box. This helps security officers quickly identify it as legitimate medical equipment.

If your EpiPen triggers additional screening, remain calm and explain its medical necessity.

TSA agents are trained to handle medical devices appropriately be it an Epipen or a mobility device.

So, feel free to take your Epipen in your hand luggage. Anaphylactic food allergy reaction or fear of insect bite allergic reaction should not stop you from flying

Best Things to Do in Bedfordshire: Explore Attractions, Nature, and Culture

If you’re looking for a place to explore that offers history, nature, and unique attractions, the County of Bedfordshire is a great choice.

You can enjoy beautiful parks, fascinating museums, and the charming countryside, making it a perfect destination for a fun day out or a relaxing weekend.

From the stunning landscapes of the Bedfordshire countryside to the rich heritage sites, there’s something for everyone.

You might visit Woburn Abbey, enjoy the scenic views at the Forest of Marston Vale, or stroll through the picturesque town of Bedford with plenty of things to do.

Bedfordshire is not just about sights; it’s also home to delightful cafes and local shops that add to the experience.

Whether you are a nature lover, a history buff, or simply in search of a fun outing, you will find plenty of things to do in this vibrant region.

Historic Sites in Bedfordshire

Bedfordshire has a rich history reflected in its many historic sites. You can explore grand estates and ancient castles that tell stories of the past. Each site offers a glimpse into the heritage and culture of the area.

Woburn Abbey

Woburn Abbey is a stunning historic house set in beautiful gardens. It was originally built in the 17th century and has been the home of the Duke of Bedford for generations. You can tour the impressive rooms filled with fine art and antiques.

The surrounding parkland is also worth exploring, with its beautiful landscapes and wildlife.

You can enjoy walks through the grounds or visit the nearby Woburn Safari Park for a family-friendly day out.

Bedford Castle

Bedford Castle has a fascinating history dating back to the 11th century.

It was built soon after the Norman Conquest and played a key role in local politics.

The castle was destroyed during the 13th century but you can still see remnants of the structure.

Visiting the site, you can walk around the grounds and imagine what life was like during medieval times.

The stunning views of the River Great Ouse add to the charm of this historic spot.

Luton Hoo Estate

Luton Hoo Estate is a magnificent stately home set in expansive gardens. Built in the 18th century, it boasts striking architecture and luxurious interiors. The estate is now a hotel but visitors can explore the parkland and gardens.

You’ll find beautiful landscapes, lakes, and a variety of wildlife.

The estate’s history includes being a retreat for royalty and serving as a location for film productions.

You can enjoy walking or simply relax in the peaceful surroundings.

Outdoor Activities and Nature Reserves

Bedfordshire offers a variety of outdoor activities and beautiful nature reserves. You can enjoy scenic views, explore wildlife, and take part in recreational activities at these popular spots.

Dunstable Downs

Dunstable Downs is a stunning area known for its high chalk hills. It’s part of the Chiltern Hills and provides great opportunities for hiking and cycling.

You can enjoy panoramic views of the countryside and spot various wildlife, including birds and butterflies.

The area also has picnic spots where you can relax. The visitor center offers information about the local environment and activities.

Whether you want to walk or simply enjoy the scenery, Dunstable Downs is a perfect choice for outdoor enthusiasts.

Whipsnade Tree Cathedral

Whipsnade Tree Cathedral is unique and captivating. It is an outdoor space created with trees in the shape of a cathedral.

This living artwork features different tree species and provides a peaceful environment for walking and contemplation.

You can explore the paths and enjoy the beauty of nature. The changing seasons provide a different experience throughout the year.

It’s a great spot for quiet reflection or a family outing while connecting with nature.

Rushmere Country Park

Rushmere Country Park covers over 400 acres and offers a mix of woodlands, lakes, and meadows.

You can hike on the various trails and observe different wildlife habitats. The park is ideal for birdwatching and spotting other animals.

Rushmere also has play areas for children and picnic spots. There are educational trails that tell you about local flora and fauna.

This park is perfect for a fun day out with friends or family while enjoying the beauty of nature.

Cultural Experiences and Arts

Bedfordshire is rich in cultural experiences and art venues. You can explore museums, historic sites, and unique attractions that showcase the region’s heritage and creativity.

You may like

Activities in Kent

The Higgins Bedford

The Higgins Bedford is a renowned museum and art gallery you should visit. It houses a variety of collections, including fine art, local history, and archaeology.

The building itself is a historical gem, combining modern and Victorian architecture.

You can see works from famous artists like John Constable and local artifacts that tell Bedford’s story.

The museum frequently hosts temporary exhibitions and events, making each visit unique.

Admission is free, allowing you to enjoy the extensive collections at your leisure.

Stockwood Discovery Centre

The Stockwood Discovery Centre is a fascinating place to explore. This center features a museum with interactive exhibits about local history and heritage.

You can learn about the history of the area through engaging displays.

One highlight is the beautiful gardens, which are perfect for a peaceful walk. The center often hosts workshops and family activities.

This makes it a great spot for visitors of all ages interested in learning more about Bedfordshire’s past.

Leighton Buzzard Railway

The Leighton Buzzard Railway is a charming narrow-gauge railway that offers a unique experience.

It runs through the scenic countryside, showcasing the beauty of the area. The railway has a rich history dating back to the 19th century.

You can ride on vintage steam and diesel engines, adding to the charm. Special events, such as themed rides and seasonal activities, provide additional fun.

This railway is a great way to spend a day while appreciating transportation history.

Family-Friendly Attractions

Bedfordshire offers several attractions that can entertain the whole family. From lively zoos to hands-on farms, you’ll find plenty to do with your loved ones.

ZSL Whipsnade Zoo

ZSL Whipsnade Zoo is one of the largest zoos in the UK. It covers 600 acres and hosts over 3,500 animals.

You can see a wide range of species, including elephants, lions, and giraffes.

The zoo has walking paths that allow you to explore different habitats.

You can also visit animal talks and demonstrations, which are both fun and educational.

Children will enjoy the play areas and the chance to see animals up close.

For a unique experience, consider taking a ride on the zoo’s open bus tour. This option gives you an excellent view of the animals and lets you cover more ground.

Mead Open Farm

Mead Open Farm is perfect for a day filled with outdoor fun. This farm features a variety of animals, including cows, goats, and pigs. It also has a range of activities for kids to enjoy.

You can visit the petting area to interact with smaller animals.

Kids will love the large adventure play area, which includes slides and climbing frames. Seasonal events like Easter egg hunts make each visit special.

There’s also a café that serves light meals and snacks. If you’re looking for a place where kids can learn about farm life while having fun, Mead Open Farm is a great choice.

Wrest Park

Wrest Park is a stunning estate with beautiful gardens and rich history.

It covers 90 acres and includes both activities and peaceful spots to relax. The gardens are designed in various styles, allowing you to enjoy different views.

You can take a guided tour to learn about the estate’s history or explore on your own. Children can enjoy the open space for games or picnics.

Special family events are held throughout the year, making it a vibrant place to visit.

Be sure to check out the playground, which offers fun equipment for kids. With its mixture of history and outdoor fun, Wrest Park is a memorable spot for families.

Local Culinary Delights

Exploring Bedfordshire’s food scene offers a mix of delightful experiences, focusing on afternoon tea, fresh local produce, and charming pubs.

Each option showcases the region’s rich culinary heritage.

Afternoon Tea Experiences

In Bedfordshire, afternoon tea is a cherished tradition.

You can enjoy a selection of finger sandwiches, scones with clotted cream, and a variety of cakes.

Many venues offer beautiful settings, perfect for relaxing afternoons.

One popular spot is The Bedfordshire Tea Room, where you can sample homemade treats alongside a wide range of teas.

Another great option is the Luton Hoo Hotel, known for its elegant tea service in a stunning historic setting.

Reservations are recommended, especially on weekends, to ensure a spot for this delightful experience.

Farmers’ Markets and Local Produce

Visiting local farmers’ markets is a great way to discover Bedfordshire’s fresh produce.

Markets like the Flitwick Farmers’ Market highlight seasonal fruits, vegetables, cheeses, and meats.

Supporting local farmers helps the community and ensures you get high-quality ingredients.

These markets often feature stalls with homemade jams, baked goods, and artisanal products.

Take the time to chat with the vendors to learn about how the food is produced.

Your support strengthens the local economy, and you get to enjoy the best flavors of the region.

Traditional Pubs and Inns

Bedfordshire is home to many traditional pubs and inns where you can enjoy hearty meals and local ales.

Establishments like The Kings Arms and The Red Lion offer classic British dishes, from fish and chips to Sunday roasts.

These pubs usually have a cozy atmosphere, ideal for relaxing with friends or family.

You can also find local beers from nearby breweries on tap. Many pubs hold events, so check their schedules for quizzes or live music nights to enhance your visit.

Now did I mention independent stores or the Hitchin market where you can shop for local food until you drop? If you`ve not been to the heart of England, this should be your next adventure.

Wildlife parks, Barton hills national nature reserve, Higgins art gallery, Bedford Park, Priory Country Park, Greensand Ridge. This is a wonderful area worth visiting.

What To Pack For A Beach Vacation For Women: Essential Items For Your Seaside Getaway

what to pack for a beach vacation

Planning a beach vacation is exciting, but packing can sometimes feel overwhelming. You want to make sure you have everything you need while not overpacking your suitcase.

A well-packed beach bag makes all the difference between a relaxing day by the ocean and a frustrating one filled with sunburns and discomfort.

With the right essentials, you can focus on enjoying the waves and sunshine instead of worrying about what you forgot.

The key items for women heading to the beach include sun protection, versatile clothing options, and a few carefully chosen accessories more than beach towels and beach umbrellas.

Your packing list should balance practical necessities with items that help you look and feel your best during your coastal getaway.

Essential Clothing Items

Packing the right clothes for your beach vacation ensures comfort and style from sunrise to sunset.

Your beach wardrobe should be versatile enough to take you from sandy shores to evening dinners with minimal effort, but then again, it`s personal preference what works best for you.

Swimwear Essentials

Pack at least two bathing suits for your trip. Having multiple swimsuits allows one to dry while you wear another, preventing the discomfort of putting on damp swimwear.

Choose styles that make you feel confident and provide the support you need.

Consider these swimwear options:

  • One-piece:  a bathing suit is great for water activities and more coverage
  • Bikini: Perfect for sunbathing and minimizing tan lines
  • Tankini: Offers coverage with mix-and-match flexibility

Don’t forget a swim cover-up or sarong. These versatile pieces transition easily from beach to casual lunch spots.

Look for quick-drying fabrics like cotton or lightweight polyester blends.

A rashguard is worth packing if you burn easily or plan extended time in the water. These protective tops shield your skin from harmful UV rays.

Daytime Outfits

Your beach day wardrobe should focus on lightweight, breathable fabrics. Pack 3-4 casual outfits that can mix and match throughout your trip.

Beach day staples:

  • 2-3 shorts (denim, linen, or cotton)
  • 3-4 t-shirts or tank tops
  • 1-2 sundresses or rompers
  • 1 pair of shorts

Linen pants or a breezy skirt serve multiple purposes during your vacation. They provide sun protection when needed and work well for casual outings away from the beach.

Consider packable hats that won’t crush in your suitcase. A wide-brimmed sun hat not only completes your beach look but also protects your face from sun damage.

Evening Attire

Beach destinations typically maintain a relaxed dress code, even in the evening. However, you’ll want a few nicer options for dinners or entertainment.

Pack these evening essentials:

  • 1-2 casual dresses that can be dressed up with accessories
  • 1 pair of nice shorts or skirt with a coordinating top
  • 1 light cardigan or wrap for cooler evening temperatures

A versatile maxi dress works wonderfully for beach vacations. It can transition from day to evening with simple accessory changes.

Consider the local culture when planning evening wear. Some upscale restaurants in beach resorts may require more modest attire, while others embrace beach casual.

A lightweight scarf can be your secret weapon to add warmth and style when needed.

Footwear for the Shore

Packing the right shoes for your beach vacation ensures comfort from sandy shores to evening outings.

The right footwear choices protect your feet and complement your beach outfits.

Beach Sandals

Flip-flops are a beach vacation essential. They’re lightweight, easy to pack, and perfect for hot sand. Look for water-resistant materials like rubber or plastic that dry quickly after getting wet.

Consider sandals with secure straps if you plan to walk longer distances. These prevent blisters and provide better support than basic flip-flops.

Some beach sandals now offer built-in arch support and cushioned footbeds. These features make a big difference during all-day wear.

Pack at least two pairs of beach sandals. This gives you options and ensures you have dry footwear if one pair gets soaked or breaks.

Evening Footwear

Dressy sandals are perfect for resort dinners or beachside restaurants. Look for pairs with metallic accents or embellishments that transition easily from day to night.

Low wedges offer height without sinking into sand. They’re more stable than stilettos and still look polished with summer dresses or pants.

Consider packable ballet flats that take minimal space in your luggage. These are versatile options when you want more coverage than sandals.

Choose neutral colors that match multiple outfits to minimize what you need to pack.

Activity Shoes

Water shoes protect your feet from sharp rocks and hot sand during water activities. They provide traction on slippery surfaces and shield against potential cuts.

If you plan to exercise, pack a pair of lightweight running or walking shoes. Many resorts have fitness centers or scenic jogging paths along the shore.

Mesh sneakers work well for casual sightseeing or short hikes near your beach destination. They’re breathable in hot weather and more supportive than sandals.

Look for shoes that dry quickly if they get wet. This prevents blisters and discomfort during your vacation activities.

Beach Accessories & Essentials

The right beach accessories make all the difference between a good beach day and a great one.

These items protect you from the sun, keep your belongings organized, and ensure your comfort throughout the day.

Sun Protection

Just like flip flops, sunscreen is your most essential beach item. Choose a broad-spectrum SPF 30-50 that’s water-resistant for up to 80 minutes.

Apply it 15-20 minutes before sun exposure and reapply every two hours or after swimming. This means you`ll need lots of sunscreen so pack enough.

Don’t forget these other sun protection items:

  • Wide-brimmed hat that covers your face, neck, and ears
  • Beach umbrella or tent for shade breaks
  • Cover-up or sarong to wear when you’re not swimming
  • UV-protective clothing with UPF 50+ rating
  • Lip balm with SPF to prevent chapped lips, I love this SPF lip balm

Remember that sun damage happens even on cloudy days. Think of the time you`ll spend at the beach and have enough for the duration of your trip.

Pack a travel-sized sunscreen in your beach bag for quick reapplication.

Eye Safety

Sunglasses are more than just a fashion statement—they’re essential protection for your eyes. UV exposure can lead to cataracts and other eye problems later in life.

Look for these features when choosing beach sunglasses:

Feature Why It Matters
100% UV protection Prevents eye damage
Polarized lenses Reduces glare from water
Wraparound style Blocks side light
Secure fit Won’t fall off during activities

Consider bringing a spare pair in case your main sunglasses get lost or broken. An eyewear retainer strap can prevent your sunglasses from sinking if they fall in the water.

Beach Bags

A good beach bag needs to be spacious, durable, and easy to clean. Mesh or canvas totes work well because sand shakes out easily.

Features to look for in the best beach bags:

  • Waterproof compartment for wet items
  • Outside pockets for quick access to small items
  • Zippered section for valuables like cell phone and wallet
  • Comfortable straps that don’t dig into your shoulders

Consider packing a small waterproof pouch inside your beach bag for your phone, cards, and cash. Bright-colored bags are easier to spot among the sea of beach gear.

Insulated sections keep drinks and snacks cool for hours. Some beach bags even come with built-in coolers for this purpose.

Personal Care Items

Beach trips require special attention to personal care since sun, sand, and saltwater can take a toll on your body.

Pack these essentials in a tote bag to stay fresh and comfortable throughout your vacation.

Dental Hygiene

Don’t forget your basic dental care items to maintain fresh breath during your beach getaway.

Pack your toothbrush in a ventilated travel case to prevent bacterial growth in the humid beach environment.

Consider bringing travel-sized toothpaste that won’t take up much space in your toiletry bag.

Look for one with fluoride protection to keep your teeth healthy while traveling.

A small bottle of mouthwash can help you feel refreshed after beach snacks and drinks. Floss or interdental brushes are compact yet essential for complete cleaning.

If you wear retainers or night guards, pack their protective cases to keep them clean from beach sand.

Hair Care & Styling

Beach conditions can be harsh on your hair, so protective products are essential. Pack a wide-tooth comb to gently detangle wet hair after swimming without causing breakage.

Beach Hair Essentials:

  • Leave-in conditioner spray (protects from salt damage)
  • Hair ties and clips (keeps hair out of your face)
  • Dry shampoo (refreshes hair between washes)
  • UV-protective hair spray (prevents sun damage)

Consider bringing a light scarf or hat to protect your hair from direct sun exposure.

If you use heat styling tools, decide if they’re necessary or if you’ll embrace natural beach waves.

Saltwater and chlorine can be drying, so pack a deep conditioning treatment to use every few days.

Skin Care

Your skin needs extra care during beach vacations due to increased sun exposure. Start with cleanser to remove sunscreen and sweat at the end of each day.

Pack a lightweight moisturizer to restore hydration. Beach environments can dehydrate your skin, even if you have oily skin naturally.

Essential Skin Care Items:

  • Gentle facial cleanser
  • Hydrating moisturizer
  • Lip balm with SPF
  • Aloe vera gel (for sunburn relief)

Don’t forget specialized treatments you use regularly, like acne spot treatments or eye cream.

These maintain your skin’s health despite environmental changes.

Consider bringing makeup remover wipes for convenience when you’re tired after long beach days.

You may like:

How to dress in Paris in style and comfort

Organizing Your Luggage

Packing efficiently saves space and keeps your beach essentials organized throughout your vacation.

Smart luggage choices and organizing tools can make a big difference in your travel experience.

You may like

Best water proof luggage for travel

The best travel bags for women

Best luggage for international travel

Luggage Selection

Choose a suitcase that matches your trip length and travel style. For beach vacations, consider a medium-sized rolling suitcase with expandable compartments.

Hard-shell luggage protects fragile items and stands up to rough handling at airports. Soft-sided bags offer more flexibility for squeezing in extra items.

Include a sturdy beach tote that can double as your carry-on bag. This multipurpose bag works for airplane essentials and daily beach trips.

Don’t forget a waterproof pouch or small bag for wet swimsuits when packing up from the beach. This prevents your other clothes from getting damp or sandy.

Using Packing Cubes

Packing cubes transform the way you organize your suitcase. These lightweight fabric containers keep similar items together and prevent clothes from shifting during travel.

Benefits of packing cubes:

  • Maximize suitcase space
  • Separate clean clothes from dirty ones
  • Find items without unpacking everything
  • Compress clothing to fit more

Assign different colored cubes to specific categories: swimwear in one, casual outfits in another, and beach accessories in a third. This creates a visual system that makes items easy to locate.

Roll clothes instead of folding them to prevent wrinkles and save space in your cubes. For beach items like cover-ups and lightweight dresses, this technique works especially well.

Destination Specifics

Different beach locations have unique features that will affect what you pack. The local climate, culture, water sports and activities will shape your packing decisions for maximum comfort and enjoyment.

The personal items you pack have to meet your needs. A complete beach packing list may differ from time to time, so always make a list before you start packing.

Consider the Locale

When visiting Puerto Vallarta, pack for warm temperatures year-round with highs of 80-90°F (27-32°C). The humidity can be high, especially during summer months (June-October).

Bring lightweight, breathable clothing that dries quickly. Cotton and linen are ideal fabrics for the tropical climate.

Include a light rain jacket or poncho if traveling during the rainy season (June-October). Afternoon showers are common but typically brief.

Cultural considerations:

  • Puerto Vallarta  for example is relatively relaxed, but modest cover-ups are appropriate when leaving the beach
  • Pack at least one nicer outfit for upscale restaurants or evening activities
  • A light scarf or wrap is useful for cooler evenings or air-conditioned spaces

Insect repellent is essential, particularly during rainy season. The local mosquitoes can be persistent in certain areas.

Beach footwear should include water shoes for rocky beaches and comfortable sandals for walking on the cobblestone streets in the old town.

Final Checklist and Packing Tips

Before you head to the beach, use this checklist to make sure you have everything you need. Print it out or save it on your phone for easy reference.

Essential Items:

  • Swimwear (at least 2 suits)
  • Cover-up or beach dress
  • Sunscreen (minimum SPF 30)I love reef-safe sunscreen
  • Sunglasses with UV protection
  • Beach hat
  • Sandals or flip-flops
  • Beach towel
  • first aid kit
  • Water bottle

Clothing:

  • T-shirts/tank tops
  • Shorts
  • Light dresses
  • Underwear and socks
  • Light jacket or sweater
  • Sleepwear
  • Extra pieces of swimwear( if needed)

Toiletries:

  • Face wash
  • Moisturizer
  • Toothbrush and toothpaste
  • Shampoo and conditioner
  • Hair ties
  • Deodorant
  • Razor
  • Makeup (minimal)
  • First aid items

Beach Extras:

  • Beach bag
  • Book or e-reader
  • Portable charger
  • Waterproof phone case
  • Snacks
  • Cash in waterproof container

Pack your bag a day before your trip to avoid forgetting important items. Roll your clothes instead of folding them to save space and reduce wrinkles.

Put toiletries in ziplock bags to prevent leaks. Keep your sunscreen in an accessible pocket so you can reapply easily.

Remember to leave some extra room in your luggage for gift shop souvenirs or purchases you might make during your vacation.

Don`t forget to bring your portable speaker to enjoy music if you decide to have a beach picnic.

Frequently Asked Questions

Beach vacations require thoughtful preparation to ensure you have everything needed for comfort, style, and protection from the elements. These common questions address the essential items and packing strategies for women planning beach getaways.

What are the beach vacation essentials for a woman?

Every woman needs a few key items for a successful beach trip. Pack at least two swimsuits to allow one to dry while wearing another.

Include a wide-brimmed hat, UV-protective sunglasses, and broad-spectrum sunscreen with SPF 30 or higher to shield yourself from harmful rays.

Beach-friendly footwear is crucial—sandals for casual walks and water shoes for rocky beaches. Don’t forget a lightweight cover-up that transitions easily from beach to casual dining.

How to create a versatile wardrobe for a 7-day beach trip?

Focus on mix-and-match pieces in complementary colors. Pack 3-4 tops, 2-3 bottoms, and 1-2 dresses that can create multiple outfits.

Choose lightweight, quick-drying fabrics like cotton, linen, and rayon. Include one light sweater or jacket for cooler evenings.

Limit shoes to three pairs: comfortable sandals, water shoes, and one dressier option. Remember, accessories like scarves and jewelry can transform basic outfits for different occasions.

Which toiletries should women include for a beach holiday?

Bring travel-sized hair and body care products suitable for sun exposure. Pack moisturizing shampoo, conditioner, and after-sun lotion to counter drying effects of salt water and sun.

Include facial cleanser, moisturizer with SPF, and waterproof mascara if you wear makeup. Lip balm with sun protection is essential for preventing chapped lips.

Don’t forget hair ties, a wide-tooth comb for detangling wet hair, and dry shampoo for quick refreshes between washes.

What are the must-have beach accessories for women?

A roomy beach bag is essential—look for one with waterproof compartments for wet items. Include a microfiber beach towel that dries quickly and takes up less space.

Bring a portable phone case or waterproof pouch to protect electronics. A reusable water bottle will help you stay hydrated in the heat.

Consider packing an inflatable beach pillow, a lightweight beach blanket, and a small portable fan for maximum comfort during long beach days.

How should a woman pack lightly for a 4-day beach getaway?

Choose dual-purpose items whenever possible. A sarong can serve as a cover-up, beach blanket, or even a casual evening wrap.

Limit clothing to 2 swimsuits, 2-3 tops, 2 bottoms, 1 dress, and 1 light jacket. Plan outfits ahead and stick to a complementary color palette.

Use packing cubes to compress clothing and roll items instead of folding. Wear your bulkiest items during travel to save luggage space.

What key items should be included in a family beach vacation packing list?

Add extra sunscreen, after-sun care, and first aid supplies when traveling with family. Pack basic medications, bandages, and antiseptic wipes for minor emergencies.

Bring entertainment options like inflatable beach toys, portable games, or waterproof playing cards. A pop-up beach tent provides valuable shade for rest periods.

Consider a cooler bag for snacks and drinks to avoid frequent trips to beachside vendors. Remember reusable water bottles for everyone to stay hydrated throughout the day.

I hope this post will help you pack easier for your next beach vacation. Remember even the ultimate beach vacation packing list has to suit YOUR needs.

Don’t overpack, local stores are sure to have items you might have forgotten like hand sanitizer or antibacterial wipes.

Remember travel tips are not a one size fits all,find what works for you.

I hope this post will help you decide better on what to pack for a beach vacation and make packing your carry-on essentials much easier. If possible, pack travel essentials to last you the entire trip, especially skincare items.

23 Hotel Safety Tips for Solo Travellers: Essential Precautions for Peace of Mind

Hotel safety tips for solo travellers

Traveling alone can be exciting but also a bit scary. Hotels are often seen as safe places, but it’s important to stay alert even there.

Knowing simple hotel safety strategies can make a huge difference in protecting you during solo trips.

Whether you’re staying in a budget hotel or luxury resort, these tips will help you avoid common risks and enjoy peace of mind.

You deserve to feel secure when exploring the world on your own. Our list of 23 hotel safety tips covers everything from choosing the right accommodation to handling emergencies while traveling solo.

These practical suggestions will help you create a personal safety plan for your next adventure, it`s not only about the right hotel but what safety experts suggest.

Choosing the Right Accommodation

Your choice of accommodation can make or break your solo travel experience. Smart selection focuses on location safety, hotel security features, and strategic room positioning to maximize your protection.

Solo travel safety tips does not end with the hotel you choose, but the most important things to do once you check into the hotel.

Prioritizing Safe Locations

Research neighborhoods before booking. Look for areas with low crime rates and good reviews from other solo travelers. Use reliable travel websites and forums to gather information about safe districts.

Avoid accommodations in isolated areas or places known for high crime. Instead, choose hotels in well-lit, busy neighborhoods with plenty of foot traffic, even at night.

Stay close to public transportation for easy movement without long walks alone. Many cities have tourist-friendly zones that maintain better security and surveillance,case of an emergency.

Consider proximity to town centre, police stations, hospitals, or other emergency services. This isn’t about being paranoid, but about making smart choices that reduce risk.

Evaluating Hotel Safety Features

Look for hotels with 24-hour front desk service and security personnel. These provide constant surveillance and someone to contact if problems arise.

Check for modern security systems like:

  • Key card access to rooms and elevators
  • Working surveillance cameras in hallways and common areas
  • Well-lit corridors, parking areas, and entrances
  • Secure door locks with deadbolts or chain locks
  • hotel room safes

Read recent reviews specifically mentioning security aspects. Other travelers often note when they felt unsafe or when security was particularly good or if they felt alarmed for safety reasons.

Larger chain hotels typically invest more in security features than small, independent properties.

However, boutique hotels in safe areas can offer personalized attention that enhances safety.

Selecting a Room Position

Request a room between the second floor and 6th floors. This balances safety from break-ins (not ground level or first floor) while remaining accessible in emergencies (not too high) in an event of a fire.

Avoid rooms near emergency exits or stairwells, as these provide easier access for potential intruders. Rooms near elevators offer quicker access but may be noisier.

Choose a room away from the main entrance of the hotel. Interior-facing rooms that overlook courtyards rather than streets provide additional security.

Not being paranoid, but room location can make a difference in your feeling safe, so extra precautions are ok.

Always inspect door and window locks immediately upon check-in. Report any issues with locks, phones, or safety features to management immediately for correction.

Preparing for Your Solo Travel

Smart preparation before your trip creates the foundation for a safe and enjoyable hotel experience. Taking time to research and plan ahead can prevent many common safety issues.

Researching Local Safety Norms

Before booking your hotel, research the safety situation in your destination. Check travel advisories from reliable government websites for current safety information about your destination country.

Look up the neighborhood where you’re planning to stay and read recent reviews from other solo travelers.

Join solo travel forums or social media groups to ask specific questions about hotel safety in your destination.

Fellow travelers often share valuable insights about which areas to avoid, especially after dark.

Make digital copies of your important documents. Store your passport, travel insurance details, and hotel reservations in a secure cloud service you can access from anywhere.

Purchase comprehensive travel insurance that covers medical emergencies, theft, and trip cancellations.

Many policies now offer 24/7 assistance services specifically designed for solo travelers.

Tell someone you trust about your itinerary. Share your hotel details, check-in dates, and rough daily plans with a family member or friend.

Check-in and First Impressions

Your first moments at a hotel set the foundation for a safe stay. Being alert during check-in and carefully examining your room can prevent many safety issues before they arise.

Interacting with Hotel Staff

Build a good relationship with front desk staff as they’re your main point of contact in emergencies.

When checking in, avoid loudly stating your room number where others might hear.

Ask for a room that isn’t on the ground floor if possible, as these are easier targets for break-ins.

Don’t accept help with luggage from people who don’t have clear hotel identification.

If someone claims to be hotel staff at your door, call the front desk to verify before letting them in.

Make note of staff shift changes so you know when different people will be on duty. This is especially important if you’ll be returning late at night.

Assessing Initial Room Safety

Once in your room, the first thing is to conduct a brief safety check before settling in.

Test that your door locks properly and use all available security measures like deadbolts and door chains. Familiarize yourself with the emergency exit plan posted on your door.

Check that the phone works by calling the front desk. The last thing you want is trying to call the front desk later only to realize the room phones are not even connected.

Verify the peephole functions correctly and isn’t damaged or blocked.

Look for potential hiding spots like behind curtains or under the bed. While this may seem excessive, it only takes seconds and provides peace of mind.

Check that your room has smoke detectors.

Make sure windows lock securely, especially if you’re on a lower floor. If any safety features are broken or missing, request a different room immediately.

Your comfort and security are valid reasons for a room change.

Some people(especially those staying in Airbnb) have complained of hidden cameras, check that your room does not have any security cameras installed.

Enhancing In-Room Security

Your hotel room should be your sanctuary while traveling solo. Taking proactive steps to secure your temporary living space can significantly reduce potential risks and give you peace of mind.

Using Additional Door Locks

Always use every lock available on your hotel room door. This includes the deadbolt, security chain, and swing bar lock. These built-in features are your first line of defense.

Consider packing a portable travel door lock or door stop alarm. These inexpensive devices add an extra layer of security that prevents the door from opening, even with a key card or master key.

For sliding doors or windows, a rubber doorstop or portable door jammer works well. Simply wedge it firmly in place before going to sleep or leaving the room.

Test all locks upon arrival to ensure they function properly. If any lock is broken, request a room change immediately rather than accepting the risk.

Utilizing the Do Not Disturb Sign

Hang your “Do Not Disturb” sign whenever you’re in the room. This simple action prevents unexpected knocks and entry attempts that might catch you off guard.

The sign also creates uncertainty about your presence, making your room a less appealing target for potential intruders. Would-be thieves typically avoid rooms that might be occupied.

When leaving for extended periods, consider leaving the sign up and the TV on at a low volume. This creates the impression someone is in the room.

Be aware that some hotels have policies about how long you can use the sign. Check with the front desk if you plan to use it continuously.

Managing Room Service and Housekeeping

Verify the identity of anyone who knocks on your door. Look through the peephole before opening, or call the front desk to confirm if housekeeping or maintenance was scheduled.

Don’t open your door to unexpected visitors. If someone claims to be staff, call the front desk to verify before letting them in.

Consider scheduling housekeeping for times when you plan to be out of the room. This allows you to secure your valuables properly before staff enters.

Keep conversations with room service or housekeeping staff professional. Avoid sharing details about your travel plans, how long you’re staying, or that you’re traveling alone.

If you feel uncomfortable with someone at your door, don’t hesitate to call the front desk or security immediately.

Personal Safety Practices

Your personal safety is in your hands when traveling solo. Good safety habits and awareness can make a significant difference in your hotel experience.

Securing Your Belongings

Always use the in-room safe for valuable items like passports, extra cash, and expensive electronics. If no safe is available, consider using a portable travel lock box.

Keep your room key separate from any identifying information. If you lose a key with your room number attached, someone could easily access your belongings.

Use a doorstop alarm when sleeping. This simple device makes it harder to open your door and sounds an alarm if someone tries to enter.

Consider bringing a lightweight cable lock to secure bags to fixed furniture when you leave the room. This prevents quick grab-and-go theft.

Take photos of important documents and store them in secure cloud storage. This ensures you have digital backups if physical copies are lost or stolen.

Trust Your Instincts

Your intuition is a powerful safety tool. If something feels wrong about a situation or person, don’t dismiss the feeling. Listen to your gut.

Be cautious of oversharing travel details with strangers. Avoid mentioning you’re traveling alone or revealing your room number in public spaces.

Change your walking routes occasionally, especially if staying multiple nights. Predictable patterns make you an easier target.

Solo female travelers should consider booking rooms on higher floors (not ground level) and away from stairwells. These locations generally offer more security.

If someone makes you uncomfortable, don’t worry about being polite. Your safety matters more than others’ feelings. Move to a public area or alert hotel staff immediately.

Staying Safe in Public Areas

Hotel common areas are where you’ll encounter the most strangers during your stay. Being vigilant in these spaces while also establishing rapport with hotel staff creates a safety network for solo travelers.

Awareness in Communal Spaces

Always maintain awareness of your surroundings in hotel lobbies, restaurants, and other public areas. Keep your valuables close to your body using a cross-body bag or money belt when moving through these spaces.

Avoid displaying expensive items like jewelry, electronics, or large amounts of cash in public areas. This makes you less of a target for opportunistic theft.

Choose seats with your back to a wall when in hotel bars or restaurants. This gives you a clear view of the entire space and prevents others from approaching unnoticed.

Be cautious about sharing personal details with strangers you meet in public areas. Avoid mentioning you’re traveling alone or which room you’re staying in.

Use hotel business centers during daylight hours when more people are around. Never leave your devices unattended, even for a minute.

You may like:

Best anti theft cross body bags for travellers

Nurturing a Connection with the Staff

Introduce yourself to front desk staff and other hotel employees. They can become valuable allies who recognize you and notice if something seems amiss.

Ask hotel staff about areas to avoid both inside and outside the property. They have local knowledge that can help you stay safe during your stay.

Let the front desk know your general plans when leaving the hotel for extended periods. This creates an informal check-in system for your safety.

Use staff services like room service or bellhop assistance when you feel uncomfortable. This is especially helpful if you return late at night.

Trust your instincts – if something feels wrong, notify hotel staff immediately. Most establishments have security protocols to handle various situations.

Emergency Situations

Being prepared for emergencies while staying at hotels can make all the difference in your safety.

Knowing what to do and where to go before a crisis happens gives you precious time when seconds count.

Locating Emergency Exits

Always identify all emergency exits immediately after checking into your hotel room.

Take a few minutes to walk the hallways and find at least two exit routes from your room.

Count the number of doors between your room and the nearest emergency exit – this will help you navigate in darkness or smoke.

Quick exit location tips:

  • Check the map on your hotel room door
  • Physically walk to each exit to confirm its location
  • Notice if exits are alarmed or locked at certain hours
  • Identify stairwells that lead directly outside

Take a photo of the emergency exit map with your phone for quick reference. This simple step might seem unnecessary but can be invaluable during an actual emergency.

Reviewing Evacuation Procedures

Most hotels post evacuation procedures inside your room door or in the guest information booklet.

Read these carefully even if you’ve stayed at many hotels before. Each property has unique evacuation routes and assembly points.

Key evacuation details to note:

  • Assembly point locations outside the building
  • Whether to use elevators (usually not recommended)
  • How to report that you’ve safely evacuated
  • Special instructions for guests with mobility issues

Practice mentally walking through the evacuation steps. In case of fire, stay low to the floor where air is clearer.

If you can’t leave your room, seal door cracks with wet towels, call for help, and signal from your window.

Technological Safety Measures

Modern technology offers powerful tools to enhance your safety while traveling alone.

These digital resources can both protect your personal information and help you maintain contact with loved ones during your journey.

Digital Privacy

Always use a VPN (Virtual Private Network) when connecting to public Wi-Fi networks in hotels. This encrypts your data and prevents hackers from accessing your personal information.

Set up two-factor authentication for your important accounts like email, banking, and social media. This adds an extra security layer even if someone discovers your password.

Be cautious about what you share online. Avoid posting your exact location in real-time, especially if you’re traveling solo.

Wait until you’ve left a location to post photos from there.

Regularly check your devices for unfamiliar apps or suspicious activity.

Update your phone and laptop software before your trip to ensure you have the latest security patches.

Staying Connected

Create a check-in schedule with a trusted friend or family member. Send them your itinerary, hotel information, and planned activities before departure.

Download offline maps of your destination before traveling. This allows you to navigate without needing an internet connection or revealing your location data.

Consider portable chargers or power banks as essential safety equipment. A dead phone can quickly become a safety risk when you’re alone in an unfamiliar place.

Use location-sharing apps like “Find My Friends” or “Life360” with trusted contacts. These allow someone to track your movements if necessary.

Research international calling options before you leave.

Either activate an international plan or download apps like WhatsApp that work over Wi-Fi for emergencies.

Navigating Local Excursions

Exploring beyond your hotel requires careful planning and awareness of your surroundings.

Your safety during local excursions depends on both communication and respect for local customs.

Communicating Your Itinerary

Always inform someone trustworthy about your daily plans. Before leaving your hotel, share your intended destinations and expected return time with the front desk staff.

Use the hotel’s business card or take a photo of the address in the local language. This helps if you need to show a taxi driver where to return you.

Consider using location-sharing apps with a trusted friend or family member back home. Apps like Find My Friends, WhatsApp, or Google Maps allow real-time tracking.

Set check-in times with contacts at home. A simple text saying “I’m back at the hotel” provides peace of mind for everyone.

Adhering to Cultural Norms

Research local customs before your trip. Understanding appropriate dress codes and gestures prevents unwanted attention and shows respect.

Observe how locals interact and dress. If women typically cover their shoulders or men avoid shorts, follow these practices to blend in better.

Learn a few basic phrases in the local language. Simple words like “hello,” “thank you,” and “help” can improve your travel experience and safety.

Be mindful of photography rules. Some locations prohibit photos, while others require permits or payments. Always ask before taking pictures of people, even in a public place.

Watch locals’ body language and behaviors in public spaces. This helps you recognize potentially unsafe areas or situations that residents avoid.

Health and Medical Preparedness

Staying healthy during solo travel requires preparation and awareness of local medical options.

Having access to healthcare resources and your necessary medications can make a critical difference in emergency situations.

Knowing Local Health Resources

Before arriving at your hotel, research nearby medical facilities. Save the locations and contact information of the closest hospital, urgent care center, and pharmacy in your phone.

Many hotels maintain a list of trusted doctors who can make house calls. Ask the front desk for this information when you check in.

Learn how to say basic medical terms in the local language, such as “I need a doctor” or “pharmacy.”

This knowledge becomes invaluable during emergencies when translation apps might not be accessible.

Consider purchasing travel health insurance if your regular policy doesn’t cover international care. Keep digital and physical copies of your insurance information readily available.

Carrying Essential Medications

Pack all prescription medications in their original containers with labels intact. Bring enough to last your entire trip, plus extra in case of unexpected delays.

Prepare a small medical kit with common items like:

  • Pain relievers
  • Bandages and antiseptic wipes
  • Anti-diarrhea medication
  • Motion sickness remedies
  • Any personal medications you regularly use

Research the legality of your medications at your destination. Some common prescriptions in your home country might be restricted elsewhere.

Keep a card in your wallet listing your medical conditions, allergies, and medications.

This information helps healthcare providers treat you properly if you’re unable to communicate.

Store medications in your carry-on luggage, not checked bags, to prevent loss during transit.

After Your Stay

Leaving your hotel safely and sharing your experience are final steps in ensuring a complete safety strategy.

Your actions after checkout can impact both your current safety and help other travelers.

Ensuring Safe Departure

When preparing to leave your hotel, pack your belongings the night before to avoid rushing and possibly forgetting important items.

Double-check all drawers, closets, and bathroom areas. Don’t leave personal information on notepads or in trash bins.

Request a final bill review before checkout to spot any unauthorized charges. If possible, avoid early morning departures when streets might be less populated.

Ask the front desk to arrange transportation directly to your next destination. Wait in the lobby rather than outside if your ride isn’t immediately available.

Return your key card to the front desk rather than leaving it in the room. This prevents others from potentially accessing your information or room after you’ve left.

Leaving Feedback for Future Travelers

Your experience can help others stay safe. Take time to write an honest review mentioning any safety concerns or positive security measures you observed.

Be specific about security features that impressed you, such as:

  • Well-lit hallways and parking areas
  • Responsive security staff
  • Reliable door locks and peepholes
  • Secure key card systems

If you encountered problems, report them factually without emotional language. Mention if management addressed your concerns appropriately.

Consider joining travel forums where you can share detailed safety tips about specific hotels. These firsthand accounts are invaluable to solo travelers planning their trips.

Remember that hotels often monitor reviews. Your feedback might prompt improvements that make everyone safer.

Frequently Asked Questions

Hotel safety concerns are common among solo travelers.

These practical solutions address door security, women’s safety, essential devices, business travel precautions, and maintaining privacy in unfamiliar accommodations.

What are effective safety hacks for solo travelers staying in hotel rooms?

Always use the peephole before opening your door to visitors. Consider placing a small rubber doorstop against the door for added security at night.

Keep your valuables in the hotel safe rather than leaving them visible in your room.

When possible, request a room between the third and sixth floors—high enough to deter break-ins but low enough for fire ladder access.

Take photos of your room when you arrive and leave to document its condition. This can prevent disputes about damages you didn’t cause.

How can a woman ensure her safety when staying alone in a hotel?

Book hotels in well-reviewed, safe neighborhoods and avoid ground floor rooms. Consider requesting a room near the elevator but not directly next to it for both convenience and reduced isolation.

Use your first initial rather than full first name when booking to maintain gender anonymity.

Don’t announce your room number loudly at check-in—ask the clerk to write it down if needed.

Maintain confidence in public areas—walk purposefully and avoid appearing lost or confused, which can make you look vulnerable.

What safety devices should be considered when traveling alone?

Pack a door alarm that hangs on the doorknob and sounds if someone attempts entry. These portable devices are small, lightweight, and very effective deterrents.

Bring a portable door lock or doorstop alarm for additional security beyond the hotel’s standard locks.

Consider a personal safety alarm that can emit a loud sound if you feel threatened.

A small flashlight or headlamp is essential in case of power outages or emergencies. Some travelers also carry window alarms that activate if glass is broken.

What precautions should business travelers take for hotel safety?

Never display confidential work documents in your room where housekeeping or others might see them.

Be cautious about using hotel business centers for sensitive work—they rarely have adequate security.

Avoid discussing your company, position, or travel schedule with strangers in the hotel. When working in your room, position yourself so your laptop screen isn’t visible to someone entering.

Use your own secure hotspot rather than hotel Wi-Fi for sensitive communications. Consider a privacy screen for your laptop to prevent visual hacking in public areas.

What steps can solo travelers take to secure their hotel room doors?

Check all locks immediately upon entering your room, including deadbolts, chain locks, and window latches.

Report any broken locks to management and request a different room if repairs aren’t possible.

Use the “Do Not Disturb” sign when you’re both in and out of the room to create uncertainty about occupancy. Place a chair or luggage against the door as a physical barrier and noise alarm.

Develop a habit of keeping your key card separate from your room number information. If lost, someone shouldn’t be able to identify which room they can access.

How can one maintain privacy and security in a hotel room as a solo guest?

Draw curtains fully, especially after dark when interior lights make it easy to see inside. Be mindful of shadows that may be visible through thin curtains or blinds.

Keep your television or radio on at a low volume when leaving to give the impression of occupancy.

Minimize sharing details about your travel plans with hotel staff or other guests.

Consider placing the “Make Up Room” sign only when you’re actually leaving for the day. Be careful about posting your location on social media until after you’ve left the hotel.

I hope my top hotel safety tips will help you navigate your travel you can also check our old post on solo travel tips.

Best Vlogging Camera for Beginners: Top Affordable Options

Vlogging has become a popular way to share your life, ideas, adventures and passions online.

Whether you’re documenting your travels, creating educational content, or simply sharing daily experiences.

Having the right camera can make a significant difference in capturing a high-quality video.

Finding the best vlogging camera as a beginner doesn’t have to be complicated or expensive with additional features.

You’ll want to consider factors like ease of use, video quality, longer recording sessions, and budget-friendly options that won’t overwhelm you with technical features.

The perfect starter video camera should help you focus on creating content rather than struggling with complex settings, and as said, it should come at a reasonable price.

1) Canon EOS M50 Mark II

The Canon EOS M50 Mark II stands out as an excellent vlogging camera for beginners. It offers a perfect balance of features, quality, and affordability that makes it easy to start your vlogging journey.

This camera comes with a 24.1 megapixel sensor that captures detailed images and videos.

You’ll appreciate the flip-out screen that lets you see yourself while recording, ensuring you stay in frame at all times.

The M50 Mark II shines with its Dual Pixel autofocus that keeps you sharp and in focus. You can move around freely while filming without worrying about blurry footage.

Another great feature is the camera’s 4K video capability. Though it has a slight crop in 4K mode, the quality is still impressive for beginners.

The built-in Wi-Fi and Bluetooth make sharing your content quick and easy. You can transfer files to your phone or computer without needing cables.

Its compact size means you can carry it anywhere. The camera is lightweight enough for extended handheld shooting without causing arm fatigue.

2) Sony ZV-1

The Sony ZV-1 is a popular choice for beginner vloggers. It’s designed specifically with content creators in mind, offering features that make vlogging easier right out of the box.

You’ll appreciate the flip-out screen that lets you see yourself while recording. This feature is essential when you’re filming yourself and need to check your framing.

The camera includes a “Product Showcase” setting that quickly shifts focus between your face and objects you hold up. This is perfect if you review products in your vlogs.

Background blur is simple to achieve with the ZV-1’s large 1-inch sensor and dedicated “Background Defocus” button.

Your footage will have that professional look that separates amateur videos from polished content with its Large 1” sensor and F2 lens, for low-light.

Audio quality is excellent thanks to the built-in directional microphone with included windscreen. You’ll get clear sound even when filming outdoors in light breezes.

The compact camera size makes the ZV-1 easy to carry all day. You can slip it into a pocket or small bag, making it convenient for shooting vlogs anywhere.

Battery life is decent, though you might want an extra battery for full-day shooting sessions.

​An affordable camera worth it`s weight in video production.

3) Panasonic Lumix G100

The Panasonic Lumix G100 is a fantastic camera for beginner vloggers. It combines portability with features specifically designed for video content creation.

At just 412g with the lens, you’ll find it easy to carry around all day. The G100 features a 20.3MP Micro Four Thirds sensor that captures sharp, detailed footage in 4K at 30fps.

The camera includes a special feature called OZO Audio by Nokia. This uses three microphones to capture clear sound from wherever you’re filming. It can even track your voice as you move around.

You’ll appreciate the fully articulating screen that lets you see yourself while recording. This makes framing your shots much easier when you’re filming yourself.

Battery life runs about 45 minutes of continuous recording, so you might want an extra battery for longer shoots. The G100 also includes built-in image stabilization which helps smooth out shaky footage when you’re moving.

Priced reasonably for its features, the Panasonic Lumix G100 gives you room to grow as your vlogging skills develop without overwhelming you with complicated settings.

4) GoPro Hero11 Black

The GoPro Hero11 Black is a compact yet powerful option for beginner vloggers. It’s especially good if you enjoy adventure content or action shots.

This tiny camera packs impressive video capabilities with 5.3K resolution recording at 60fps.

You’ll get super smooth footage thanks to its advanced stabilization technology called HyperSmooth 5.0.

The Hero11 Black features a new, larger image sensor that captures more of the scene. This gives you more flexibility when editing, allowing you to crop without losing quality.

Battery life has improved over previous models, letting you vlog longer without interruptions. You can also swap batteries easily when needed.

The camera is completely waterproof without needing extra housing. You can take it swimming, surfing, or film in the rain without worry.

Its intuitive touchscreen makes it simple to change settings or review footage. GoPro’s app also lets you control the camera remotely and edit videos directly from your phone.

While small, the built-in microphones capture decent audio. For better sound quality, you can connect external microphones through an adapter.

To me, gopro is my happy vlogging camera, small size but mighty, it is for anyone who wants a simple non fancy camera.

5) DJI Pocket 2

The DJI Pocket 2 is a tiny but powerful camera that fits in your pocket. It’s a perfect camera for beginners who want to create smooth, stable videos without carrying heavy equipment.A good camera all way round.

What makes the Pocket 2 special is its built-in 3-axis gimbal. This technology keeps your footage steady even when you’re walking or moving around.

You don’t need extra stabilization gear or complicated editing.

The camera shoots 4K video at 60fps and takes 64MP photos.

These specs are impressive for such a small device. You can capture high-quality content that looks professional from the start.

The Pocket 2 has smart tracking features that can follow subjects automatically. This is helpful when you’re filming yourself or trying to capture moving objects.

Battery life lasts about 140 minutes of continuous recording. You can easily charge it between shoots using a USB-C connection.

While the built-in microphone is decent, you can attach external mics for better audio. Sound quality matters just as much as video quality in vlogging.

The Pocket 2 costs around $349, making it a mid-range option for beginners serious about vlogging.

6) Canon PowerShot G7 X Mark III

The Canon powershot G7 Mark III is a compact powerhouse that’s perfect for beginners looking to start their vlogging journey.

It features a 20.1-megapixel 1-inch CMOS sensor that captures crisp, detailed images even in low light conditions.

One of the standout features is the ability to livestream directly to YouTube, which sets it apart from many other vlogging cameras.

You can share your adventures in real-time with your audience without needing additional equipment.

The flip-up touchscreen makes it easy to frame yourself while recording.

This is essential when you’re filming yourself and need to ensure you’re properly in the shot.

The 4K video capability delivers professional-looking footage that will impress your viewers.

You also get uncropped 4K recording, meaning you capture the full width of the sensor.

Battery life is solid with approximately 265 shots per charge. You can record about 55 minutes of continuous video, which is sufficient for most vlogging sessions.

The compact size makes it easy to carry around all day. It fits comfortably in your pocket or small bag, making it ideal for on-the-go content creation.

7) FujiFilm X-A7

The FujiFilm X-A7 is a great entry-level camera for vloggers who want quality without complexity. It features a 24.2MP APS-C sensor that captures detailed images and 4K video at 30fps.

You’ll appreciate the fully articulating touchscreen that makes self-recording simple.

This 3.5-inch screen is larger than most competitors, giving you a clear view of your framing while filming yourself.

The X-A7 weighs just 455g with the kit lens, making it easy to carry around all day. Its lightweight design prevents arm fatigue during extended shooting sessions.

Battery life is solid, offering about 270 shots per charge. For vlogging sessions, you can expect around 60-90 minutes of continuous recording time.

Connectivity options include Bluetooth and Wi-Fi for quick transfers to your smartphone. This makes it easy to share content while on the go.

The Face/Eye Detection autofocus works well for keeping you in focus during vlogs. The camera also handles low light situations better than many cameras in this price range.

8) Nikon Z30

The Nikon Z30 is a compact mirrorless camera designed specifically with vloggers in mind.

It features a 20.9-megapixel APS-C sensor that captures detailed images and 4K video at 30fps.

You’ll appreciate the fully articulating touchscreen that flips around to face you while recording.

This makes it easy to frame yourself properly and monitor your footage as you shoot.

The Z30 has excellent autofocus with eye-detection that keeps you sharp as you move around.

It also includes built-in stereo microphones with a wind-noise reduction feature to improve audio quality outdoors.

Battery life is solid, giving you about 75 minutes of continuous video recording. The camera’s lightweight design (approximately 405g with battery) makes it comfortable to hold during long shooting sessions.

You can connect the Z30 to your smartphone using Nikon’s SnapBridge app for quick file transfers and remote control.

The camera accepts Nikon’s Z-mount lenses, giving you plenty of options as your skills grow.

For beginners, the Nikon Z30 offers an intuitive menu system and dedicated video recording button that simplifies the vlogging process.

9) Sony Alpha a6400

The Sony Alpha a6400 is a top choice for beginner vloggers who want quality without overwhelming complexity.

This mirrorless camera offers a perfect balance of advanced features and user-friendly operation.

You’ll appreciate the a6400’s excellent 24.2MP APS-C sensor that delivers sharp, detailed footage in various lighting conditions.

The camera’s 4K video recording capability ensures your vlogs look professional right from the start.

One standout feature is the 180-degree tiltable screen that lets you see yourself while filming. This makes framing shots much easier when you’re recording yourself.

The a6400 boasts Sony’s advanced autofocus system with real-time tracking and eye detection. You won’t need to worry about staying in focus while moving around during your vlogs.

Battery life is decent, giving you enough recording time for most vlogging sessions. The compact size makes it easy to carry around all day.

While not the cheapest option, the Sony Alpha a6400 offers excellent value considering its video quality and features.

You can start with the kit lens and expand your collection as your skills grow.

10) Olympus OM-D E-M10 Mark IV

The Olympus OM-D E-M10 Mark IV is a great choice for beginner vloggers who want quality without too much weight. It features a 20MP sensor and in-body image stabilization that helps keep your videos smooth even when you’re moving around.

You’ll appreciate the flip-down screen that makes seeing yourself while recording much easier. This camera also shoots 4K video, giving your vlogs a professional look that viewers expect today.

The compact size makes it perfect for carrying around all day. You can easily slip it into a small bag when you’re not using it.

Battery life is decent, giving you enough power for most vlogging sessions.

The camera also connects to your phone via Bluetooth and Wi-Fi, so you can quickly transfer videos for editing or posting.

At a mid-range price point, this Olympus offers good value for beginners.

The manual controls are intuitive enough for you to learn photography basics while the auto modes help you get started right away.

Understanding Vlogging Camera Features

When shopping for a beginner vlogging camera, knowing which features matter most will help you make the right choice.

Two critical elements that affect video quality are sensor size and image stabilization.

You may like

Best cameras for wildlife photography

Camera lenses explained

Importance of Sensor Size

Sensor size directly impacts your video quality and low-light performance.

A larger sensor captures more light, resulting in cleaner footage with less digital noise when filming in dimly lit environments.

Most beginner vlogging cameras come with one of these sensor types:

  • 1-inch sensors: Good balance of quality and camera size
  • Micro Four Thirds: Larger than 1-inch, popular in mirrorless cameras
  • APS-C: Even larger, provides excellent image quality
  • Full-frame: Professional-level, best for low light but most expensive

The right sensor depends on your needs. For indoor vlogs or evening shoots, prioritize a larger sensor.

If you’ll mostly film in daylight, a smaller sensor in a more portable camera might work better for you.

The Role of Image Stabilization

Image stabilization (IS) keeps your footage smooth even when you’re moving. Without it, your videos can appear shaky and unprofessional.

There are two main types:

  1. Optical stabilization: Built into the lens or sensor, provides better results
  2. Electronic stabilization: Software-based, less effective but better than nothing

Many newer cameras offer hybrid stabilization that combines both methods for superior results. Some even provide special stabilization modes for walking or action shots.

For vlogging, look for cameras advertising at least 3-axis stabilization.

This helps smooth movement in multiple directions, which is especially important when walking and talking to the camera.

Types of Vlogging Cameras

When starting your vlogging journey, choosing the right camera type is crucial. The market offers different options that balance features, size, and price to match your specific needs.

Compact Cameras

Compact cameras (also called point-and-shoot cameras) are excellent starter options for vlogging.

They’re lightweight, portable, and typically more affordable than other types. Many modern compact cameras include features specifically helpful for vlogging.

These cameras usually have flip screens so you can see yourself while recording. Models like the Sony ZV-1 and Canon G7X Mark III offer 4K video quality in a pocket-sized package.

Key advantages of compact cameras:

  • Size: Easy to carry anywhere
  • Simplicity: User-friendly controls
  • Price: Generally more budget-friendly
  • Built-in lens: No need to buy separate lenses

The main limitation is that you can’t change lenses. This means less flexibility for different shooting situations.

Mirrorless Cameras

Mirrorless cameras represent the sweet spot between professional quality and manageable size. They offer interchangeable lenses, larger sensors, and excellent video capabilities.

Popular mirrorless options for beginner vloggers include the Sony Alpha a6400 and Fujifilm X-S10.

These cameras deliver exceptional video quality and perform well in various lighting conditions.

Benefits of mirrorless cameras:

  • Image quality: Larger sensors capture more detail
  • Lens options: Swap lenses for different looks and situations
  • Low-light performance: Better results when shooting indoors or at night
  • Autofocus: Fast, accurate subject tracking

The downsides include higher cost and slightly larger size compared to compact cameras. You’ll also need to invest in additional interchangeable lens models over time.

Frequently Asked Questions

Many beginner vloggers have common questions when choosing their first camera. These answers will help you make an informed decision about features, budget, and what to prioritize.

What features should I look for in a vlogging camera as a beginner?

Look for a camera with a flip screen so you can see yourself while recording. Good autofocus is essential to keep yourself in focus while moving.

Built-in image stabilization helps create smoother footage when recording handheld.

A camera with decent low-light performance will give you flexibility to shoot in various conditions.

Mic input is valuable since audio quality greatly impacts viewer engagement. Also consider size and weight, as you’ll likely carry your camera often.

How much should I expect to spend on a decent entry-level vlogging camera?

You can find quality vlogging cameras starting around $500-$700. The Canon EOS M50 Mark II and Sony ZV-1 fall in this range and offer excellent features for beginners.

If your budget is tighter, consider previous models or refurbished options around $400. For premium features, cameras like the Panasonic Lumix G100 might push toward $800.

Remember that investing in a decent camera now can save money long-term as your skills grow.

Are there specific camera brands that are recommended for beginner vloggers?

Sony, Canon, and Panasonic have excellent reputations for making beginner-friendly vlogging cameras. Sony’s ZV-1 was designed specifically with vloggers in mind.

Canon offers great color science and user-friendly menus that beginners appreciate. Panasonic’s Lumix series provides good value with strong video features.

DJI and GoPro are worth considering if you need something extremely portable or action-oriented.

Can you recommend a good vlogging camera that works well in low-light conditions for beginners?

The Sony ZV-1 performs impressively in low light thanks to its 1-inch sensor and bright f/1.8-2.8 lens. This combination captures more light than typical compact cameras.

The Canon EOS M50 Mark II with its APS-C sensor also handles dim environments well. You can enhance its capabilities further with a fast prime lens.

For extremely dark settings, consider the GoPro Hero11 Black with its Night Mode, though you’ll sacrifice some image quality compared to larger sensors.

What is the difference between a camera for vlogging and a regular digital camera?

Vlogging cameras typically feature front-facing screens so you can see yourself while recording.

They often include enhanced autofocus systems designed to track faces reliably.

Built-in microphones are usually higher quality on vlogging cameras.

Many also include special video features like background blur, product showcase modes, or vertical video support.

Size matters too—vlogging cameras are generally lightweight and portable since they’re designed to be carried around for extended periods.

How important is audio quality when choosing a beginner’s vlogging camera?

Audio quality is extremely important—perhaps even more crucial than video quality. Viewers will tolerate slightly imperfect video, but poor audio can make them click away quickly.

Look for cameras with external microphone inputs like the Panasonic Lumix G100 or Canon EOS M50 Mark II. This allows you to add a shotgun or lavalier mic for clearer sound.

Some cameras like the Sony ZV-1 include directional microphones with wind screens, which improve audio quality even without external accessories.

As you get to be a seasoned vlogger with extensive experience,you may find yourself still turning to these cameras.

Wallet friendly,exceptional performance, and great value for money.So go ahead, start vlogging and create your YouTube channel.